Ramblings
Strawberry Balsamic Glazed Brownies
There is a store near my house that is just Pure Genius! I am not kidding.
If you are remotely in the slightest bit into cooking….. you would think this store is the coolest thing EVA!
It is called DEVO and is located here in Myrtle Beach. It is a shop full of Gourmet Olive Oils and Balsamic Vinegars.
BUT! That isn’t the cool part. The cool part is YOU.GET.TO.TASTE.THEM!!!!!!!!! All of them! Anyone you want!
Go for it! However! Proceed with CAUTION! You will not be able to decide upon only one, so you will end up buying a ton of different ones!
They have the original store in Branson, MO. However, this is the first additional one they opened here locally. So glad they did.
Make sure you check out their site here.

Let me just tell you about the Strawberry Balsamic Vinegar. O.M.G.!!! is all I can say. This stuff is good. No! This stuff is GREAT! The kinda great that makes you want to go and hide somewhere with it and just GUZZLE it. Only you would probably immediately think that was a BAD idea once you remembered it was Balsamic Vinegar. REGARDLESS! This stuff is UH…… MAYYYYY……ZING! (Is that a word???? Don’t check my spelling.)
They give you little disposable cups and allow you to serve yourself. They have things like Blood Orange Olive Oil, Lavender Olive Oil and Lavender Balsamic Vinegar…… They even have Chocolate Balsamic Vinegar. I mean, come on!
Instead of going on and on about the products that they carry, let me just start by telling you what I did to some ordinary Store Bought Boxed Brownies!

First, I took probably the best brownie mix on earth and fixed them according to the package instructions.

Once they cooled slightly, I turned them out onto a cutting board, top side up. Then I pricked the top all over with a toothpick.

Then I took this Strawberry Balsamic goodness and ………….

heated about a cup of it on the stove.

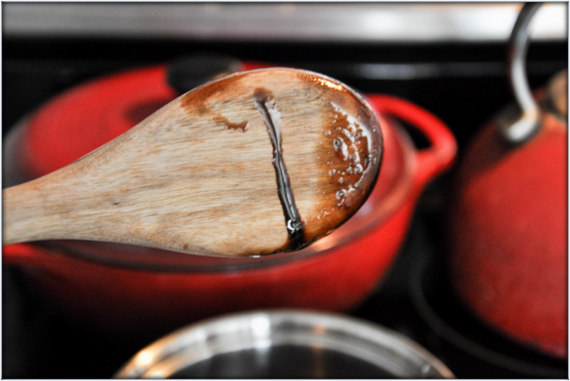
I did this until the vinegar reduced by about half and coated the spoon like a syrup. (About 10-12 minutes)

Then I poured that delicious syrup over the slightly cooled brownies. OHHHHH! YEAHHHHH!

I spread it out over the brownies with a basting brush so that every possible inch would be covered.

I know it looks sticky. That is why you need to put it in the fridge for about 10 minutes so that it can set up.

I flipped it over after it had set up in the fridge and sprinkled powdered sugar over that side.

Then I flipped it over and did the other side too.

So! I had NOT one………

BUT, both sides with powdered sugar on it.

Let me just tell you! The taste is a slightly zinged out subtle strawberry flavor that is slightly sticky, but chewy sweet!
In other words……… YOU HEART ME! YOU JUST DON”T KNOW IT YET! 😉

ENJOY and ALWAYS serve with milk!
Recipe: Strawberry Balsamic Glazed Brownies
Ingredients:
– One store bought box of Brownies (cooked according to package instructions) *I used Ghirardelli Double Chocolate Mix
– 1 Cup Strawberry Balsamic Vinegar
– Powdered Sugar for dusting
Directions:
– After cooking brownies according to package instructions, allow to cool slightly.
– Heat Vinegar in a medium saucepan until bubbly and allow to simmer for 10 to 12 minutes or until reduced by half. (mixture will heavily coat a wooden spoon and appear syrup like)
– Meanwhile, prick slightly cooled brownies all over with a toothpick or fork.
– Pour thickened vinegar over brownies and spread with basting brush or backside of spoon. *NOTE: Do this quickly as it will become more difficult as the syrup cools.
– Allow to set up in fridge for atleast 10 minutes.
– Dust powdered sugar over one side of brownies.
– Carefully flip brownies over by laying another cutting board over and carefully flipping over.
– Dust other side of brownies with a layer of powdered sugar. *You should now have both sides of brownies dusted with powdered sugar.
– Cut brownie sheet into pieces and serve with ice cold milk.
NOTE: As brownies sit, powdered sugar may melt into brownies. If this happens, simply sprinkle with more powdered sugar before serving.
*DISCLOSURE: In no way shape or form has DEVO paid me to write this Blog Post. Just a simple fan who loves their products. Trust me! I have reached out to them and said….. “WILL WORK FOR BALSAMIC VINEGAR AND OLIVE OIL!” LOL!
A Present from my Sister: Crocheted Scarf
Let me just tell you about my sister.
She got TALENT!
Like the kind of talent that is given to the first child (her) and skips over the second child (me).
I always wanted to be gifted at things like sewing and knitting and crocheting, but ALAS….. I AM NOT.
My sissy on the other hand ………… IS!
So, you can imagine my jealousy excitement when she made my mom a scarf one afternoon. Yes! I said “one afternoon”! Hate LOVE HER!
Now, you can imagine my EXTREME EXCITEMENT when she said she was going to make me one!
No, honestly, all joking aside, I really love my sissy. She is VERY talented and I love her even more for it.

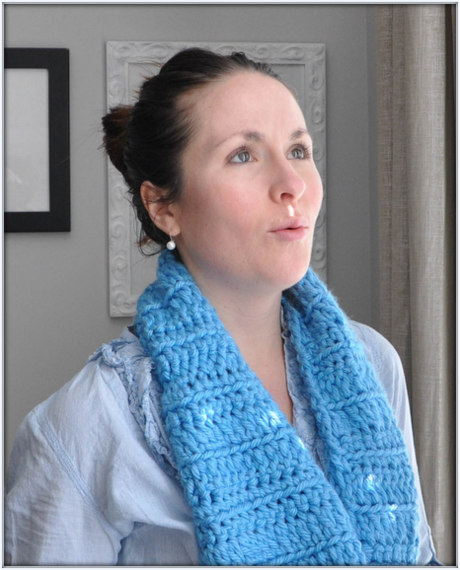
Here is a pic of the scarf she crocheted me. I just love it! It is SUPER warm and beautiful!
My mom tried to take a pic of me with it on. I put makeup on so I wouldn’t scare anyone.
Only problem with your mom taking pics of you…………

is you get “light boogers”. Yup! I said it….. BOOGERS!
Let’s try this again…………..

Much better!

Here are some tutus and leotards she made for my girls that we used for our family pics on the beach one summer. I told you! Talented!!!
Photo courtesy of : Adele Lee Photography
I started to think about other outfits I could wear with the scarf she made me. AND because I was so FULL of energy to try them all on…….

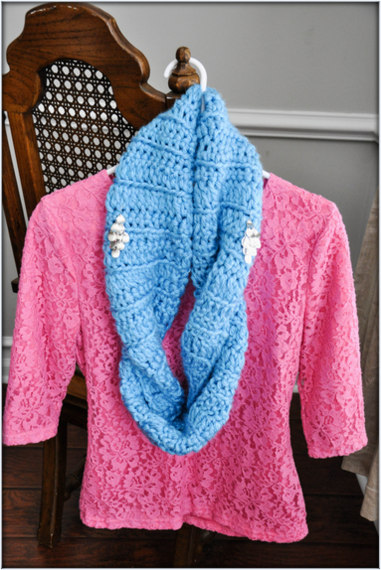
I decided it would be much better to hang them on my dining room chair instead.

I think layering different shades of one color is so pretty. Kind of a Blue on Blue on Blue kind of thing. (Not to be worn on a rainy day.)

You could always go a little rugged with some cowboy boots and florals. I love this look. So relaxed, but still so feminine.

Or, you could alway dress it up with a little lace and silver dangles.

I’m SOOO happy my sister decided to make me one of these scarfs! If you want, she can make you one too! Make sure you check out her Etsy shop here.
Kitchen Cabinets (Makeover)
It was funny.
A couple of weeks ago,
a couple of women came to my home for the first time.
I remember we were talking about where I had gotten things I decorated the room with and what had been done to the house since we had bought it and moved in.
Then, we came to the cabinets in the kitchen.
One of the women had commented on how much she liked the original deep color of the cabinets.
I started to discuss how we had just bought the paint to start my next project, which would be painting the cabinets.
It’s funny because everyone looks at you when you say the dreaded words……
PAINT THE CABINETS!…. duh duh duhhhhhhhhh!
I, myself, was even guilty of this as recently as a few years back.
In fact, my husband, THE PAINTER was even guilty of this as recently as….. oh, I dont know…. a few MONTHS ago.
We had painted ….. attempted to paint our previous home’s cabinets several years ago.
It didn’t turn out so well. (Shhhh! Don’t tell my painter I said that.)
Back then, even though Z was a painter, he wasn’t up to speed with new products and he liked to “wing it” a lot. (too much)
Now that I have bashed my hubby for a few minutes (Sorry sweetie!)…
let me take a second to praise him.
He has since become awesome! The most awesomest, cutest painter I know.

This is what our cabinets looked like before. Since we had installed the flooring in the house, everything was starting to look like one continuous color in the kitchen.
That sometimes works, but considering everything was that same brown, it was taking away from the floors moment to shine.
I really felt like if we just painted them, it would take care of it.

BUT! Then, I would have moments like this. Where I would look at it from a little distance and would think,”Now that doesn’t look so bad.”
Then I would have my “Clueless moment”. Not the mental one. The movie one.
You know, the part in the movie where Cher says, “It’s like a Monet!”
“It looks fine from a distance, but up close…………..

It’s a BIG OLE STINKIN MESS!”
I may or may not have added a few words there…..
So!
Since I only get things painted around my house when it rains…..
I got started.
It only took me 2 Rain Dances before the Rain Gods answered my request with some Wet Weather.
So, WE got started.

First we removed the doors and hardware. Then we took an electric sander and roughed them up.
Here is one like the one we used.
This is a very important step because you want to give the coating something to stick to.
If you just try to paint right over the cabinets, it will still work, but for the longevity of it, you should rough them up prior to application. Otherwise, it may start to peel a little down the road.
You can use sandpaper grit between 150 – 220 for this. For the power sander, they come in discs for this.

Then start painting! I’m going to tell you a secret…..
The paint we used for the cabinets doesn’t even need a primer prior to application!
SAY WHAT!?!
Yup! No primer! In fact, it is specially designed for cabinets and it is called Cabinet Coating.
It is a product carried by our local paint store, Spectrum Paints.
Others may carry it, but I haven’t checked. It is kind of pricey per gallon at $55/ea.
However, when you consider the fact that we only had to get 1 gallon for the base cabinets and 1 gallon for the upper cabinets AND still have left over, it is a pretty good deal.
We used a 4 in. wide Mohair Roller brush and a regular Paint brush for application.

Another great thing about this product is that it is “self leveling”, which means that when it dries, it levels out any brush strokes and looks like you sprayed it on or better yet… like you bought them that way.
We chose Benjamin Moore colors for the cabinets.
I also decided to do a “two toned” color palette.
It simply means that you go with one color for the base cabinets and a different one for the uppers.
The color for the base cabinets is Fieldstone.
The color for the upper cabinets is Vanilla Milkshake.

AND VOILA!
Now, I know what you are saying….. Ummmm. That’s a lot of gray!
Well, my camera was having a hissy fit that day and for some reason, everything looked very much the same color.
(It’s not though.)

Here is a little better idea of what it looks like. I know it is hard to believe, but the base color is actually darker than it appears in the picture.
I just love the way they turned out.

The floors finally have their moment to shine and do not have to compete with the cabinets any longer.

It’s like a breath of fresh air now coming into the kitchen. It’s so light and airy and somewhat beachy without being “cheesy beachy”???

The wineglasses finally have a home of their own.

The crystal knobs make me smile. FYI: Lowes and Home Depot have them for $3.97 ea.

Z hung my pot rack that I stole off of Joss and Main for $102.00, which might sound like a lot, but when you consider the fact that it has even a small amount of copper in it, it is an awesome price!
So, now I have more room in my cabinets.

I know I have shown shots of my little “conversation area” a million times, but I have added a light over the end table, so I had to share.
Probably won’t be the last time I throw a pic of this spot up here either.

See! Told ya! (Here is a closer look at the light)

I have been wanting this phrase for a while and saw it at a friend’s vinyl letter party, so I bought it right away. If you like it, email me and I can give you the name of the rep that I bought it from.
(Now, if I can only get Z to paint the crown…….)

I used to be that person who hung plates ALLLLL around her house. I have since toned it down a little, but when my mom bought this set for me for Christmas, I knew exactly where it was going to go.
The words are from “Patty Cake, Baker’s Man”, which my mom used to sing with me all the time when I was a baby, and I have with my own babies.
(Made me cry when I opened it.)

I let the light be darker in this picture, so it could really pick up on the green in the base cabinets.

I have wanted a set of measuring spoons like this ever since I saw Paula Deen’s on her show. Her’s were real pewter and I wasn’t about to spend that kind of money on something that I was going to get dirty all the time. LOL!
So, while Christmas shopping, my mom and I stumbled upon these at a cute shop in Myrtle Beach for $24.95. They have the same look of pewter without the price tag!!!!
I have since seen them all over, so if you do not plan on traveling to Myrtle Beach anytime soon, you could still find them.
*I just wanted to drop a little note. While I like to think I know a lot about painting, the truth is ……. I don’t. (I only know a little)
The other truth is…. Z DOES!
It’s his job and passion and has been for years.
I usually type my posts while he isn’t here. Then, he usually comes home and says, “Why did you tell everyone to buy that type of paint?!!?” Ooops!
Then, I go back on my site and correct what I wrote wrong! YIKES! LOL!
SO!
If you should have any questions at all, please feel free to email me and let me know and I will ask the EXPERT!
Then! I’ll even write you back with the answer! 😉
*I also wanted to add that the reps at Spectrum Paint said that while they can pretty much do any color in the Cabinet Coating, the best results are with “Pastel” colors. Apparently, the darker the color, the softer it makes the Coating.
The lighter colors do not break down the Coating and allow it to harden as it dries, yielding better results!
Hope you found some inspiration with the kitchen cabinets. I will probably do an update soon. We plan on painting the ceiling…..
Happy Thursday!
-Esther
Master Bedroom (Update): Adding Curtains
Just wanted to make a little update to the Master Bedroom. Since the last post, I added the curtains behind the bed.
It’s still not any closer to being done,
but then again….. is a house ever really done?
The phrase I just used made Z’s stomach start to hurt when I shared it with him…… Oh well.
Here is a pic of the room now with curtains.

I cannot believe what curtains can do for a room.
Honestly, they are the icing on the cake if you really want to soften up a room.
See for yourself. Here is the pic of the bedroom in the earlier post WITHOUT curtains.

Just adding the curtains has really done a lot for the space.
Here it is now below WITH…..

I bought the curtains from a store called Tuesday Morning about 5 years ago and they are still just as nice as the day I bought them.
I paid a little more for them, but they were worth every penny.
If you have one in your town, you should definitely check it out.
Tuesday Morning is basically a smaller version of Homegoods. You can get namebrand things there for much cheaper than you would pay in other stores.
I love those curtains because in certain light, they look light green…. and in other light, they look light blue.
I also bought a few picture frames while I was at “my second home” the other day. ( Homegoods )

They don’t have anyone in them yet. They are just sitting pretty on my dresser right now.
I paid only $6.99 for each of them.

Hopefully I’ll get around to it soon….
In case you missed the original post about the Master Bedroom, you can check it out here.
Until next time….
-Esther


You must be logged in to post a comment.