
Summer
Shrimp, Tomatoes, and Orzo with Basil

(Recipe adapted from Martha Stewart’s Cookbook, “One Pot Meals”)
Hello, my beautiful Friends! I have really missed you!
I am so excited to get back to blogging after this long hiatus I have been on. I thought it would be simple to blog while my family lived in our tiny little apartment for the past 6 months, but boy was I wrong. We were falling on top of each other all the time and adding blogging to that situation was a NO GO! We just recently started liking each other again. LOL!
I kept telling myself that one day I would be able to look back on this temporary decision and be happy I made it. Honestly, I second guessed myself ALLLLLL THEEEEE TIME!
BUT!
I can finally say that the day came when I could finally say that the decision did actually pay off. We couldn’t afford to build our home while still living in the home we had. So, we sold first, then did a 6 month lease while it was built.
That is behind us now since we recently moved in. (Everybody take a deep breath with me and exhale slowly now…………AHHHHHHHHHHH! )
Ok, enough jibber jabber!
In honor of the interesting Summer I had, I want to share a recipe that represents everything Summer to me! Shrimp, basil, and tomatoes!
This recipe is both yummy AND light!
ENJOY!

Recipe: Shrimp, Tomatoes, and Orzo with Basil
• 3 Cups halved Grape Tomatoes, Halved
• 6 Garlic Cloves, Minced
• 2 Tablespoons Extra-Virgin Olive Oil
• 3/4 lb. Orzo
• 3 1/4 Cups Low-Sodium Chicken Broth
• 1 1/2 lbs. Large Shrimp, Peeled and Deveined
• 1 Cup Fresh Basil Leaves, Chopped
Directions:
• Preheat oven to 400 degrees. Position rack in the top position.
• In a large ovenproof skillet with a tight-fitting lid, heat 1 tablespoon plus 2 teaspoons oil over medium heat.
• Add garlic and cook until just beginning to brown, 1 minute. Increase heat to high and add tomatoes; season with salt and pepper. Cook, stirring occasionally, until softened, 6 minutes.
• Add orzo and broth, and bring to a simmer.
• Cover and bake until liquid is mostly absorbed, 10 to 12 minutes.
• Toss shrimp with remaining teaspoon oil and 1/4 teaspoon each salt and pepper. Remove skillet from oven, and place shimp on top of orzo.
• Heat broiler. Broil until shrimp are opaque throughout, 4 minutes.
• Sprinkle with basil and serve.

A Tale of Homemade Cayenne and Red Pepper Flakes

There is a man, in a house, in The Farm, that loves a pepper bush. It’s his pride and joy.
Well, I guess he just loves peppers in general.
This man loves his pepper bush so much that he made a necklace of all the peppers that came off of it during the long hot Summer and hung them to dry.

At night, all he would dream of was the beautiful peppers that abundantly grew. He carefully picked and separated all the good from the bad.

He made sure to make the “necklace” of only the strongest fishing wire that would surely stay strong all Summer long.

One day, his loving, sweet, clumsy wife decided to surprise the man and turn his beautifully dried peppers into something that would last much longer than the peppers ever could.

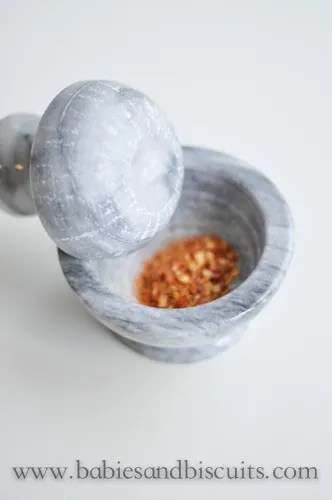
She decided to make his peppers into Ground Cayenne Peppers.

So, the good wife threw caution to the wind and picked up the dried peppers (without gloves) like a boss, pinching them one by one, and throwing them into the food processor.
What the good wife DIDN’T know was that even though the skins ground up beautifully, the seeds would not, NO MATTER HOW LONG she processed them.
So!
Being the smart wife she was, she decided to remove the lid of the processor…………. only to be met by an invisible cloud of festering fire! The kind that starts inconspicuously in your nostrils and then quickly moves to your sinuses and before you know it, turns your body into a rage of sneezing convulsions.
PLAN B! , she thought!
Once her body stopped spasming from the uncontrollable sneezing, she regrouped and went to the store to buy a Pestle and Mortar set. She had always wanted one and this may just be the perfect opportunity!
When the good wife returned home, she braved the concoction yet once again. Armed with her new tool,
she thought surely it would work this time………

The good wife’s optimism was only met with disappointment when she realized that the seeds would not grind up with the Pestle and Mortar set either.
PLAN C, she thought!
What better gift …………. than that of not one, but two gifts!
So!
It was then and only then when she was faced with yet another obstacle, that she truly found what she was supposed to do all along.
The good wife decided to give the man Dried Red Pepper Flakes and Ground Cayenne Pepper.
The Red Pepper Flakes were abundant!

The Ground Cayenne Pepper?………………….. Not so much.
No worries though. The wife was very happy.
And the man?
Well, the man was very grateful.
If! And only if you are truly brave, proceed to the recipe below:
And just so you know, it wouldn’t hurt to wear a mask……. or two! LOL!
Recipe: Homemade Ground Cayenne Pepper and Red Pepper Flakes
– Dried Peppers from Cayenne Pepper Bush
– Teaspoon Salt
Directions:
– Pinch stems off tops of dried peppers and add to a Food Processor or Pestle and Mortar. Add salt and process or grind until you reach desired consistency.
– Separate flakes from ground cayenne by using a sifter.
– Store in an air tight container.

End of Summer Risotto

Do you love Risotto? Do you love Summer?
Well friends, let me tell you…… if the answer was yes to either one of those questions, you WILL LOVE this recipe!
For some reason, I have always loved veggies. That’s not to say that I eat them all the time, or I’m a vegetarian (I tried to be a couple of times and FAILED MISERABLY!………….BOTH ………TIMES!)
I just haven’t met a vegetable I didn’t like. I have asked my mother what she did differently during her pregnancy with me, but she wouldn’t give me the secret, so alas, I have not been able to recreate this my own kiddos.
I have to say that while this wasn’t a hit with all 3 of the kids, it WAS with one and Mom and Dad. (*So maybe I got the pregnancy secret down with one of the kids and not the others, right? LOL!)
For some who aren’t familiar with risotto, it is basically rice that you cook slowly and add liquid and other ingredients too that in the end, becomes a rich, creamy, thick rice dish. In other words, YUMMY!
I cannot claim this recipe for my own. I got it from one of my go to Cookbooks, Cooking Light: Good Mood Food.
I always seem to tweak my recipes just a little, so it never ends up exactly like the original, but that’s ok with me. 😉

I really think you are going to love this!
Here you go!
Recipe: End of Summer Risotto
• 6 cups of water
• 1 pound asparagus, trimmed and cut into 3/4 in. pieces
• 1 3/4 cups fat-free, lower-sodium chicken broth
• 2 tbsp. olive oil
• 1 1/2 cups chopped onion
• 2 garlic cloves, minced
• 1 cup uncooked Arborio Rice
• 1 cup Frozen Shelled Edamame
• 1/2 Kosher Salt
• 1/2 Teaspoon Kosher Salt
• 2 oz. (1/3 – less- fat cream cheese (about 1/4 cup)
• 1/2 Teaspoon freshly ground black pepper
• 1 oz. Shredded Parmesan (about 1/4 cup) * You can find this in the pre-shredded packaged cheese in your grocery store.
• 2 Tbsp. chopped fresh thyme or * Dried Thyme works just fine! Just remember to reduce the amount. Dried is stronger than fresh.
Directions:
– Bring 4 cups water to a boil in a saucepan. Add asparagus, and cook 2 minutes. Drain. Bring 2 cups water and chicken broth to a simmer in a saucepan.
– Heat a large saucepan over medium heat. Add olive oil, and swirl to coat. Add onions; cook 4 minutes. Add garlic, and cook 2 minutes, stirring constantly. Stir in rice, edamame, and salt; cook 1 minute. Stir in 1 cup broth mixture,; cook 4 minutes or until liquid is nearly absorbed, stirring constantly. Add remaining broth mixture, 1/2 cup at a time, stirring constantly until liquid is absorbed before adding more ( about 20 minutes total.)
– Stir in asparagus, cream cheese, and pepper; cook 1 minute.
– Spoon risotto into a large serving bowl, OR * 4 individual bowls if main dish. Top the large bowl with 1/4 cup of parmesan cheese or 1 Tbsp. of the parmesan if you are serving in individual bowls.
– Sprinkle with Thyme.
SERVES: 4 if serving as main dish, and much more if serving as side.
SIDE NOTE:
I loved this so much, I had it the next day with left overs! For dinner the night before, we served it with Grilled Chicken. So for left overs, I made it a single bowl full of yumminess!

I ended up with left over Risotto, Grilled Chicken, and added Wilted Kale over top. I love pepper too so I got a little heavy handed on that end, but oh my word!
So So Good!
Hope you enjoy!
XoXo,
Esther

Peach and Blueberry Fruit Crisp

The other night, we had my brother’s sweet girlfriend’s family over. We were meeting them for the first time, so we were very excited! We did really simple cookout food. Just hamburgers, pasta salads, baked beans, deviled eggs…… and a Peach and Blueberry Crisp for dessert!
I had never made it before and I usually NEVER do a new recipe for company. Especially company I have never met!
We put everything together a few hours before everyone got there so we could spend time with everyone without having to worry about slaving over a stove in the process.

We blanched the peaches in boiling water first, then transferred them quickly to cold water. *This helps the skins peel off really easily. Then we sliced them in big chunky pieces…… added some extra goodies like lemon zest, lemon juice, sugar etc. and then tossed in some blueberries and layered on the bottom of a stoneware baker.

I could have just ate the dessert as it was then and there, but instead…… we added some more goodness!

Yummers!

The kids wanted to help me so I let them spread the crumble for the “crisp” part on top.

I love recipes like this that allow the kids to jump in and help, and allow me not to worry. You really cannot mess this topping up. It’s very easy! Just spread on top like you want! Then pop it into the oven for 45 minutes!
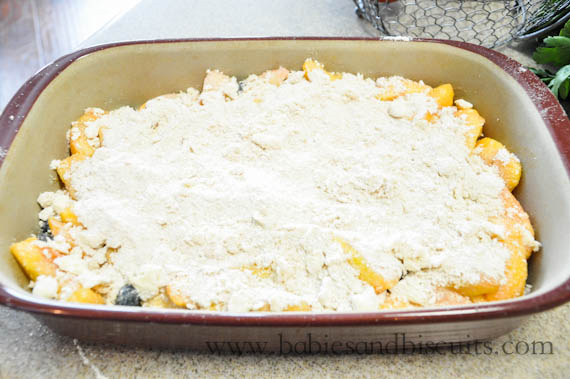
This is what it looked like before going into the oven……………
Now! Let me just take a “sidebar moment” to tell you something.
I rock in Dance Central 3.
Yes, I ROCK!
You may be asking yourself, “What on earth does that have to do with a Peach and Blueberry Crisp?”
Well, I’ll tell you.
After the crisp had gone about 45 minutes, my mom and I decided to check on it. We both decided that the topping wasn’t “browned” enough for our taste. SO! We thought, let’s broil it on low for a few minutes!
Just about that time, my oldest daughter started to say she was the best at Dance Off 3 and knowing this was untrue, I decided to challenge her to a duel! I looked at mom at that point, and she said, “I got this! Go! Go show your 9 year old who is boss!”
Well, in the middle of my 3 minutes duel, I smelled something……….. I didn’t smell the sweet aroma of a perfectly browned Peach and Blueberry Crisp bubbling away in the oven.
NO!
I smelled something far worse! It was the UNPLEASANT aroma of a perfectly BURNT Peach and Blueberry Crisp BURNING AWAY in the oven!
“MOM!”, I yelled.
(*Mom was no where to be found!) Mom had actually gone outside to tell everyone it was time to eat and walked away for a minute too long and POOF! *Sorry I called you out mom! I may have just lost my one and only reader! 😉
Well, there was only one thing to do. We did what every other smart, honest cooks would do………
We scraped off the burnt parts……….
REdid the topping………..
Plopped that stuff back on…………….
And put her back in the oven for 8 minutes and kept on truckin!
And may I say it turned out just fine!

And no one knows about our little mishap but ME, MOM,

And mom’s dog, Pepper! 😉 Shhhhhh!
Recipe: Peach and Blueberry Fruit Crisp
Ingredients:
– 2lbs. firm, ripe peaches (6 to 8 peaches)
– 2 teaspoons grated lemon zest
– 2 tablespoons freshly squeezed lemon juice
– 1/2 cup granulated sugar
– 1/4 cup all-purpose flour
– 1 cup fresh blueberries (1/2 pint)
For the crumble:
– 1 cup all-purpose flour
– 1/3 cup granulated sugar
– 1/4 cup light brown sugar, lightly packed
– 1/2 teaspoon kosher salt
– 1/4 teaspoon ground cinnamon
– 1/4 lb (1 stick) cold unsalted butter, diced
Directions:
– Preheat the oven to 350 degrees F.
– Immerse the peaches in boiling water for 30 seconds to 1 minute, until their skins peel off easily. Place them immediately in cold water. Peel the peaches, slice them into thick wedges, and place them in a large bowl. Add the lemon zest, lemon juice, granulated sugar, and flour. Toss well. Gently mix in the blueberries. Allow the mixture to sit for 5 minutes. Spoon the mixture into ramekins or one large baking dish. * I used a 13 x 9 in. pan.
– For the topping, combine the flour, granulated sugar, brown sugar salt, cinnamon, and the butter into the of an electric mixer fitted with a paddle attachment and mix until the butter is the size of peas. *If you do not have a mixer, no problem! Just mix well in a bowl and break up the diced butter with a fork or pastry cutter until the butter resembles small peas. Rub the mixture with your fingertips until it’s in big crumbles, then sprinkle evenly over the fruit. Place in oven and bake for 40-45 minutes or until the top is browned and juices are bubbly.
– Serve warm or at room temperature. Vanilla ice cream goes great with this!

 |
 |
|
 |

You must be logged in to post a comment.